Create Project and Item Templates in Visual Studio (Revit API+WPF Series 1/3)
In this three-part series, I will be tackling about proper basic integration of Windows Presentation Foundation (WPF) in your Revit API plug-ins using C# .NET.
For the first part, we will discuss creating project and item templates that we will use to create new projects with WPF functionality. For the item template, however, the objective is to be able to create plug-in executable classes without repeatedly creating lines common to your coding workflow.
Creating a Project Template
Visual Studio does not provide a class library project template that we can use for our WOF-ed plugins. So we need to create it. We will be starting to create a project template from a WPF application.
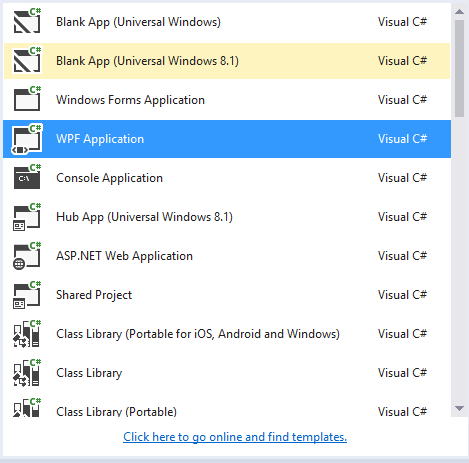
1.) From the File menu, create a new project. On the left panel, select either C# or Visual Basic, and from the center panel, select WPF Application (see figure below).
Name your project appropriately, (in my case, it’s Revit API with WPF), and then click the OK button.
Initially, the new project is created like the figure below. There are files created here that we really do not need, so we have to remove them.
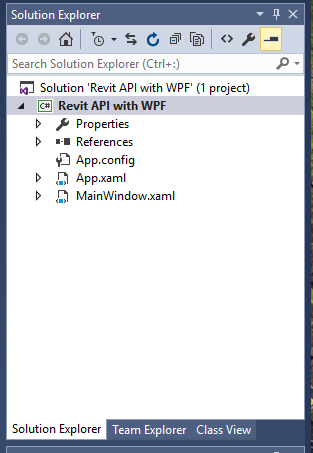
2.) Delete the files MainWindow.xaml, App.xaml and App.config. All subsequent files will be deleted automatically.
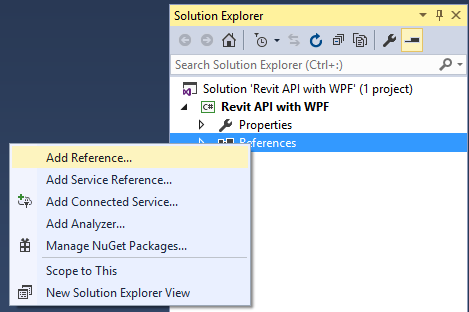
3.) Let us add the reference files we need for creating new Revit API plugins.
From the Solution Explorer window, right-click on References, and click Add Reference…
4.) The Reference Manager window as shown below will open. Click on the Browse… button.

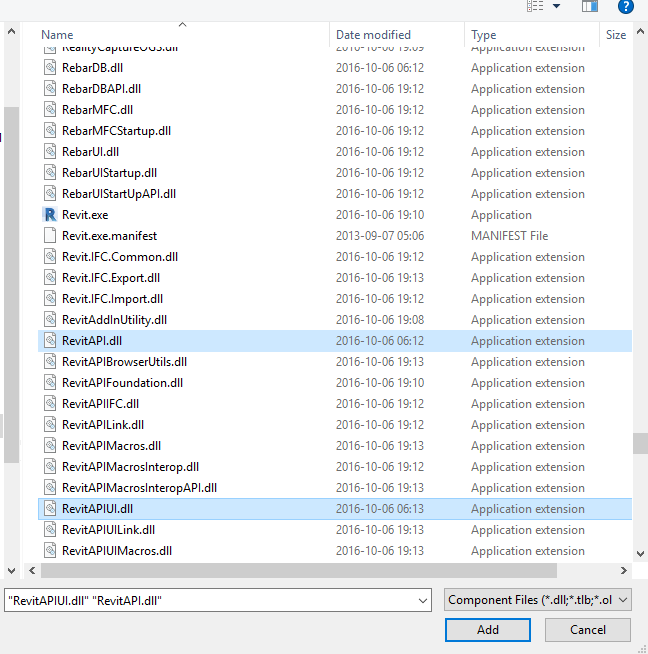
5.) Browse to your Revit application location, and select the files RevitAPI.dll and RevitAPIUI.dll. Click on the Add button when done. Then on the Reference Manager window, click OK.
Try to expand the References item from the Solution Explorer window, and we can confirm that the files were added.
Everytime we create a new Revit plugin project, these files will be included in our project. But most of the time, these files post a warning saying that their location is not found.
To enable the location of these files to be always found, let us proceed to the next step.

6.) In the Solution Explorer window, right-click on the project name, and select Properties… and in the properties window, select the Reference Paths item.

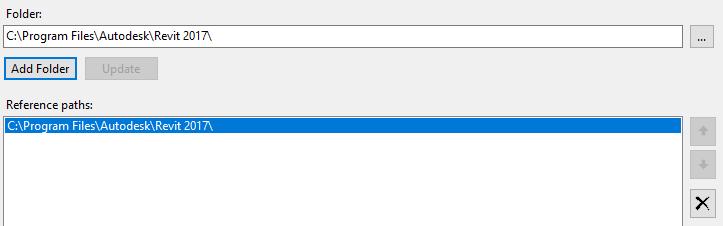
7.) Click the ellipsis button on the upper right hand of the window, and browse for the folder where the reference files we just added are located.

Click the Add Folder button. When we add the folder, Visual Studio will recognize the location of the reference files, and the warning icon will not show up anymore.
In addition to this, whenever we update these reference files to newer versions, we will just re-locate the folder (if in case we update the files to a version say Revit 2018, we can just change the text 2017 to 2018 and click the Update button).
Let us set the output type of this project template. Since we are creating a project template which is a class library, let us set it to a class library.
8.) In the same window, switch to the Application tab. Set the Output Type to Class Library.
Close the window if you wish.

9.) Compile the project. The compile must be successful.
Next, we need to change one property from the project, but we will not do this inside Visual Studio.
10.) Open Windows Explorer and locate the project. Right-click on the project file (the one with a .csproj extension), and open the file with Notepad or any text editor you have (mine is with Notepad++).

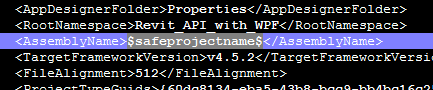
11.) From the text editor, look for the line with a <AssemblyName> entry. The entry must be the same as the name of our project.

Change the name with $safeprojectname$.
We do this so that whenever we create a new project, the assembly name will always be the name of our project. If we do not, the assembly name will always be the name of the project template.
12.) Save the file in your text editor.
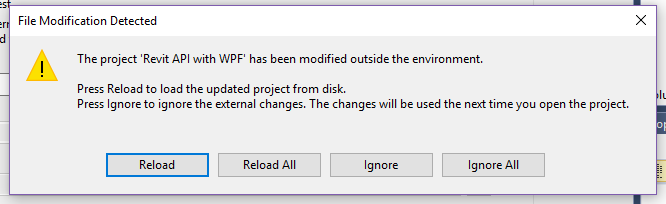
When we do that, Visual Studio will prompt like the window show below.
Click on Reload to reload and update the project file.
Now the necessary basic settings are done, we can already export the project to a template.
13.) From the File menu, select Export Template…

14.) Make sure the template type is set to Project Template. Then click the Next> button.

15.) In the Select Template Options window, give an appropriate template name and template description.
Optionally, you can attach icon and preview images for the template.
Leave all other options as is.

16.) Click on the Finish button to create the project template.
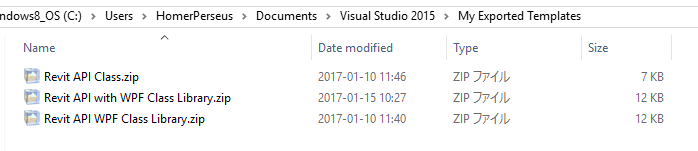
The File Explorer will open and show us fhe location of the created template. Close this window when done.
17.) Try to create a project using the project we just created.
Create a new project from the File menu, and from the template panel, check if the project template is included. If included, select the template and press the OK button.

18.) Look at the Solution Explorer window and check the reference files are added and without warnings.
Also, try to open the Properties window of the project, and from the Applications tab, check if the assembly name is the name of our project name.
When things gone well, we need to check one more thing.
Let us try to add a WPF window.

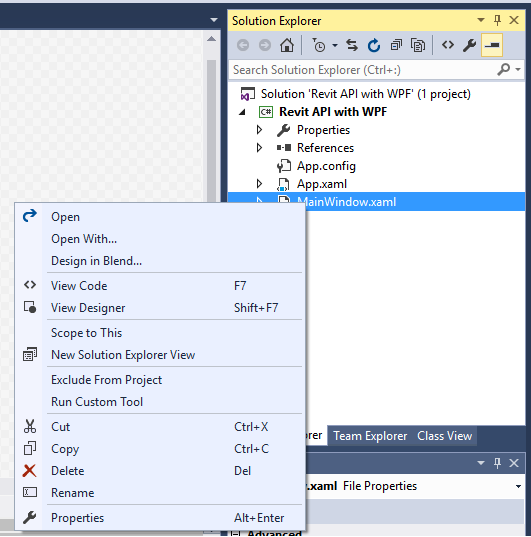
19.) Right-click on the project name in the Solution Explorer, and then from the Add item, select Window…

20.) The template panel must show templates with the (WPF) text.
Select Window (WPF), give it a name, and press the Add button.

Now our template is also capable of creating WPF windows.

Creating an Item Template
Although this has nothing to do with WPF, we take advantage of this procedure because we also need to create new plugin classes compliant with our coding workflow.
1.) Reopen the project template project we created earlier.
2.) Right-click on the project name from the Solution Explorer. From the Add item, select New Item…

3.) From the middle panel, select Class. Give the new class an appropriate file name, and click on the Add button.

3.) Copy the code on the figure below.
To reduce the typing effort, we do the following sub-steps.
Since the class derives from IExternalCommand interface class, input IExternalCommand after the class name separated by a comma. Press Ctrl+. (period) and select Autodesk.Revit.UI to add the reference class.
Right-click over the IExternalCommand base class, and from the context menu, implement the IExternalCommand interface.
This procedure will add the Execute function inside the class.
In the Execute function, add the other set of code as shown below. Also, add the other lines with the using statement and the Transaction attribute above the class declaration.
The code inside the Execute function may differ to your liking.

4.) Let us change the class name to comply with the template settings. Select the class name and replace it with $safeitemname$ as shown below.


5.) Save the file. Then from the File menu, select Export Template…
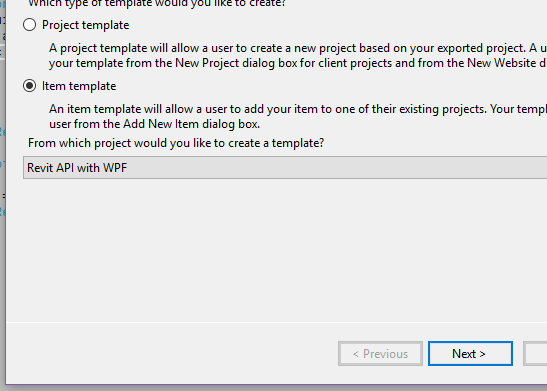
6.) From the window, select Item Template, then click Next >.
7.) In the Select Item to Export window, check on the file we just created. In this case, the Revit API Executable.cs file.
Click Next > afterwards.

8.) In the next window, we can add reference files necessary for our item template. Since we do not need any, just click Next >.

9.) In the next window, enter the appropriate template name, description and images if needed.
Click the Finish button when done.

Let us see if the item template will appear in the item templates list.
Before we proceed, I recommend to re-open Visual Studio in order for the new item template to be loaded properly.
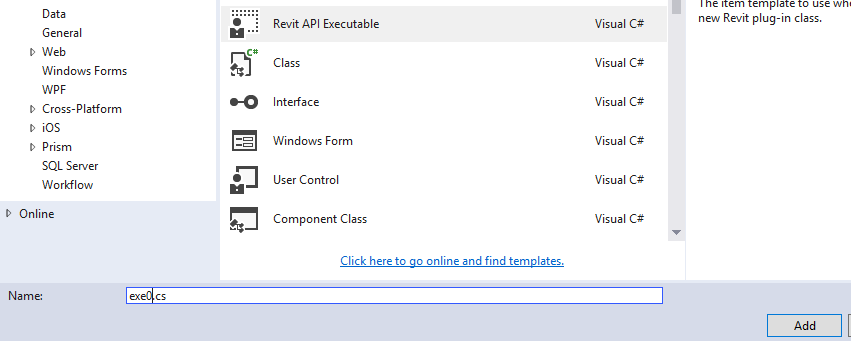
10.) Open the test project we created earlier. Try to add a new item.
Once the window is opened, we can see that our item template is already loaded in Visual Studio.
Select the template, give an appropriate file name, and click Add.
The new class file will contain all the code we entered during the creation. Also, we can see that the class name is the name of the file.

So there you have it.
If you have any questions, feedback or comments regarding this post, please make sure to post them in the comment section below.
Hi!
I get an error after following this guide and starting a new Revit project with the new template:
Autodesk.Revit.Exceptions.InvalidOperationException
RevitWPFTest.RevitExecutableClass does not inherit IExternalApplication
It’s already inheriting IExternalCommand so I don’t understand why it want’s the IExternalApplication. Do you have any ideas?
Thanks!
I somehow made a mistake in my .addin-file. I had then it should have been
I somehow made a mistake in my .addin-file. I had AddIn Type=”Application” when it should have been AddIn Type=”Command”
Good thing you found it. Good luck on your plugin building and thank you for peeking at my blog! I will be posting more in this WPF series when I got time so stay informed.
hi, i’m using Visual Studio 2017 & Revit 2018. I’ve followed your instructions, btw after I reloaded the text file, there are App.config, App.xaml, MainWindow.xaml appeared with a small yellow triangle with each at the Solution Explore , and when i tried to export temple, there was a dialog said that “could not find the App.config. Could you please give me a solution to fix that? thanks so much
sorry, I checked and it worked perfectly 🙂 thanks
Hi there, Lam.
Sorry for the reply with a long overdue.
You can just delete them anyway. It does not affect when you create your own template as long as it is a Class Library.